Panelling Arduino Minis
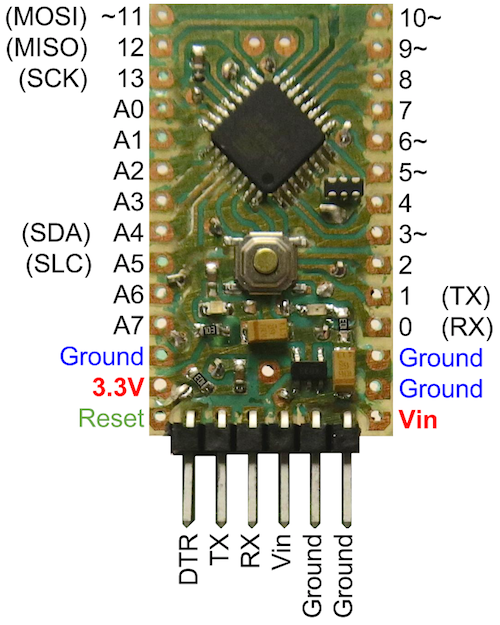
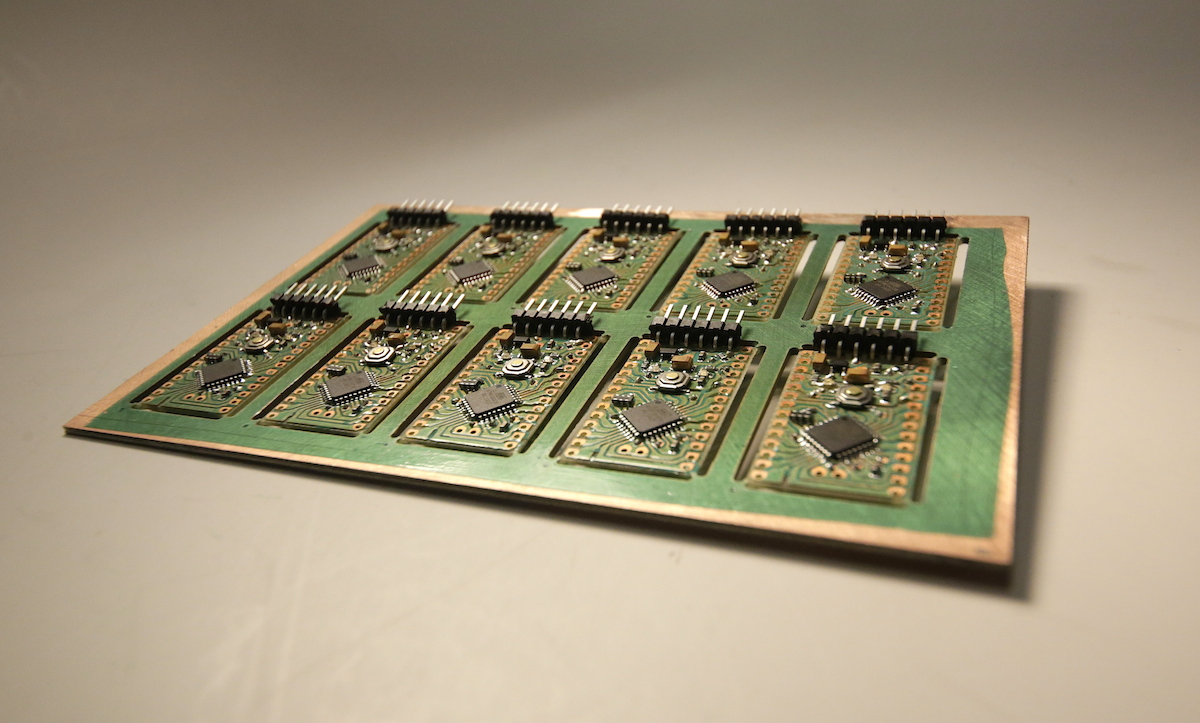
Here are some pictures of my attempt at making a panel of 10 Arduino Mini’s of my own design. You can find the pin layout, board files, and other documentation on GitHub;
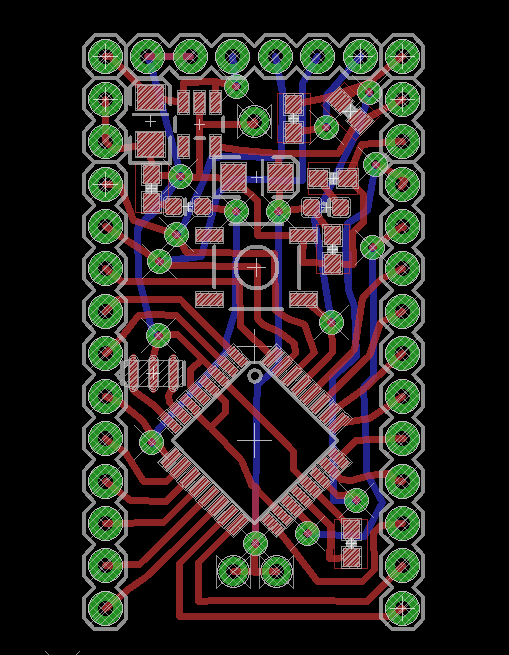
I’ve been working on this board design for a while, trying to make the board small and simple, yet having to consider the limitations of making my own PCBs in house (namely, vias being so difficult to make).
These 10 boards were created within one day at ITP. I milled the panel in the morning, cleaned and added solder mask in the afternoon, and assembled at night. It was a long process, but I’ve never been able to make 10 boards of such quality and in such a short amount of time.
Solder Mask Results
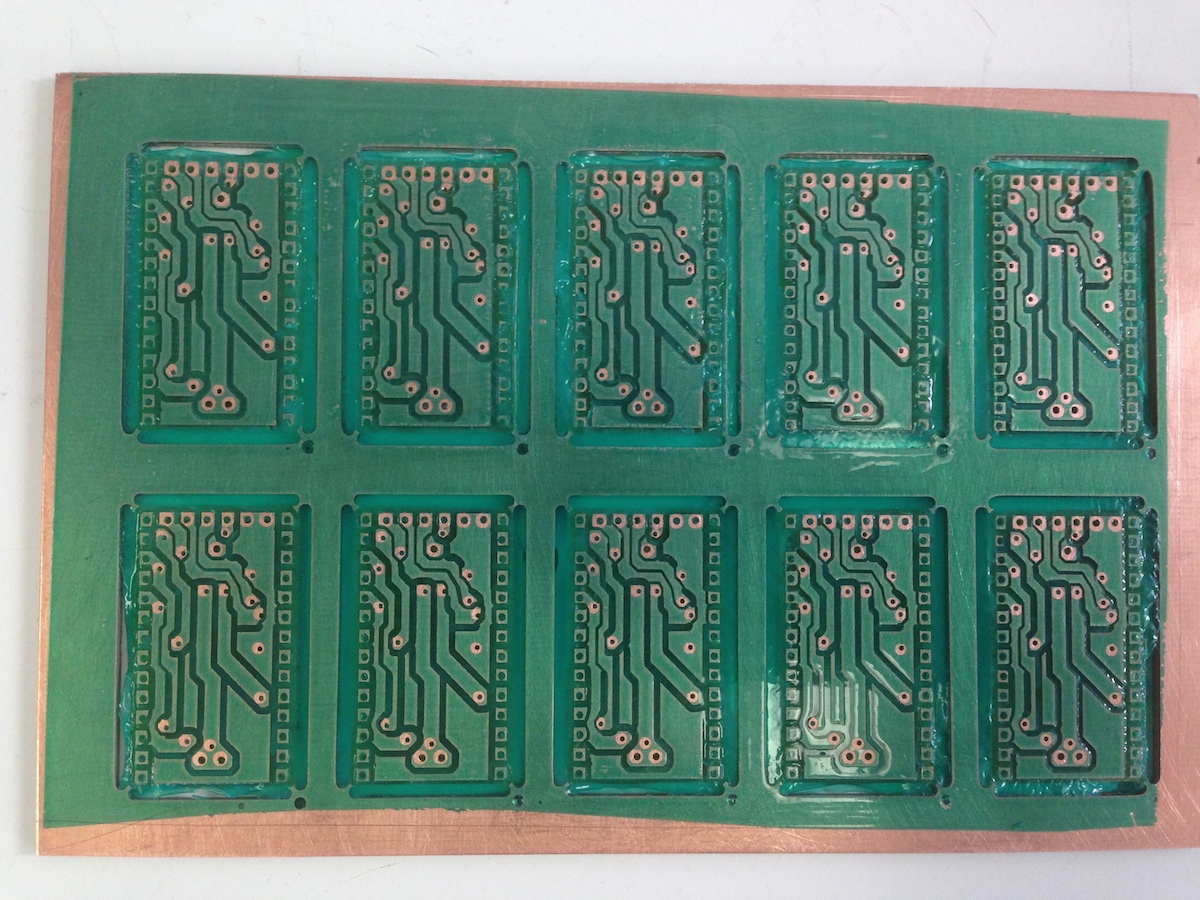
I’ve been using Dynamask dry-film solder mask, and it’s made populating boards much easier. I’ve documented the process a bit in my blog, and below are some pictures of my panel after milling and applying the solder mask.
Top layer:

Bottom layer:
Pretty picture:

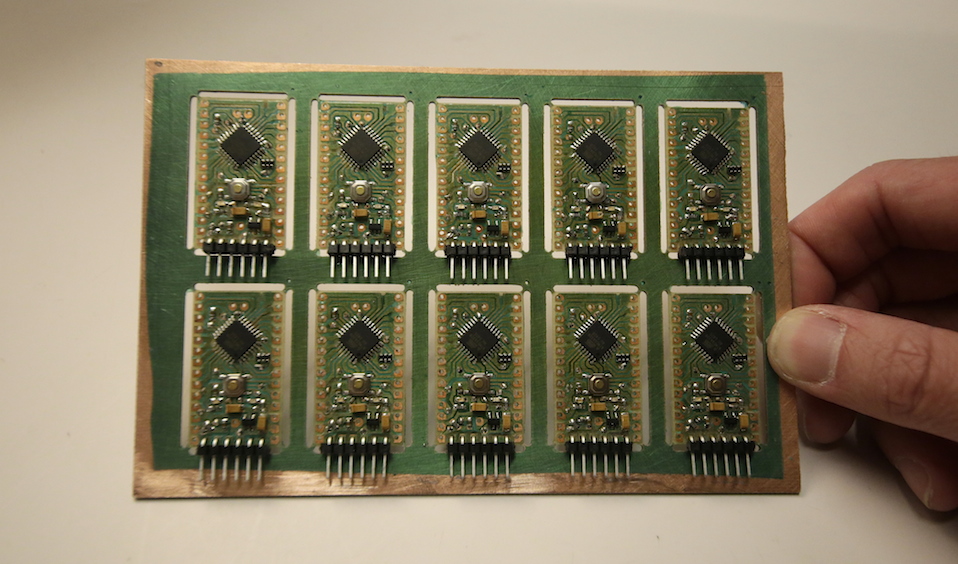
Results after Assembly
I used ITP’s manual pick-and-place machine to lay out the solder and place each component. I then reflowed using a heat gun, and finally soldered together all the vias.
The vias are what takes the longest, and greatly restrict your design. I use a thin piece of wire to connect the top and bottom of the PCB, then solder each side. This means that there can not be any vias underneath any component or IC, and that they need a considerable amount of space to allow the solder to melt with causing any shorts.
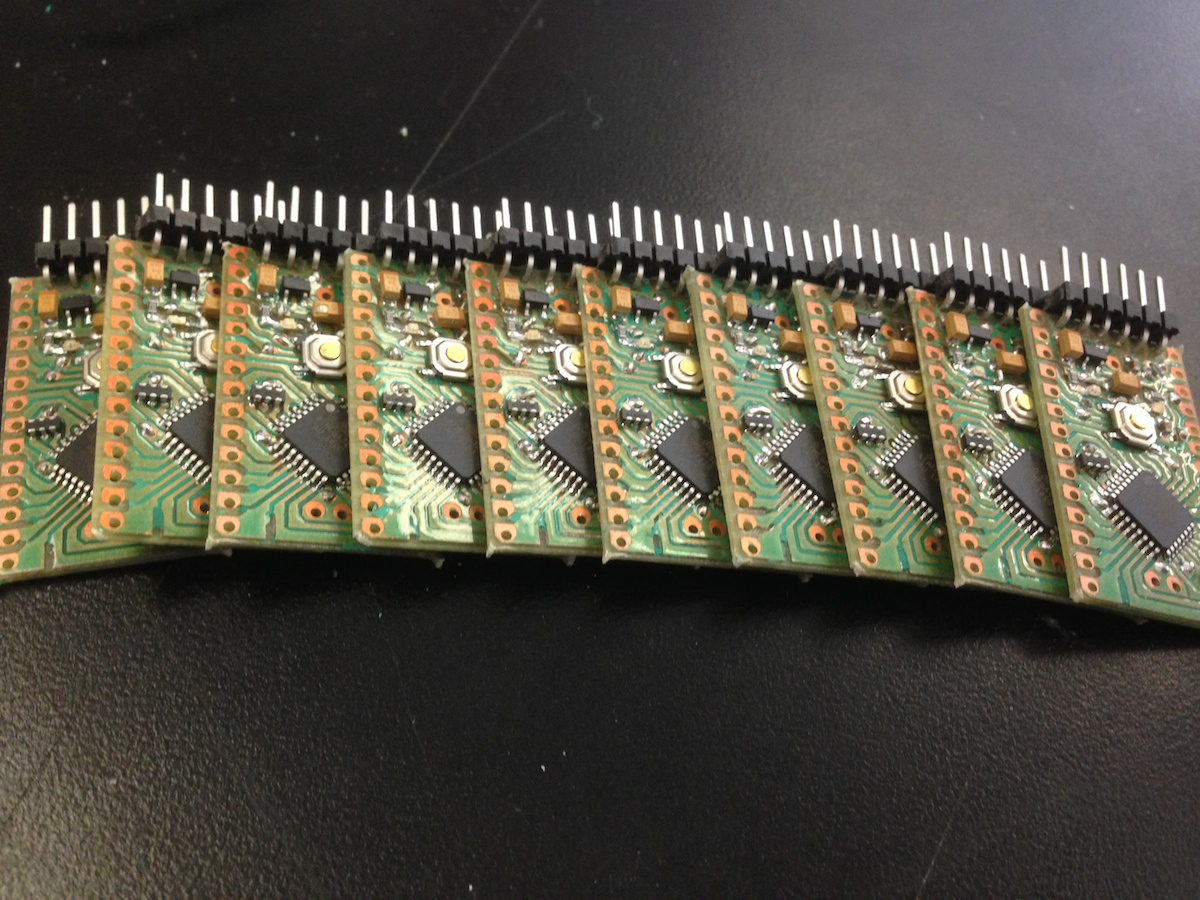
Broken Out Boards
Bootloaded and test, they all work!
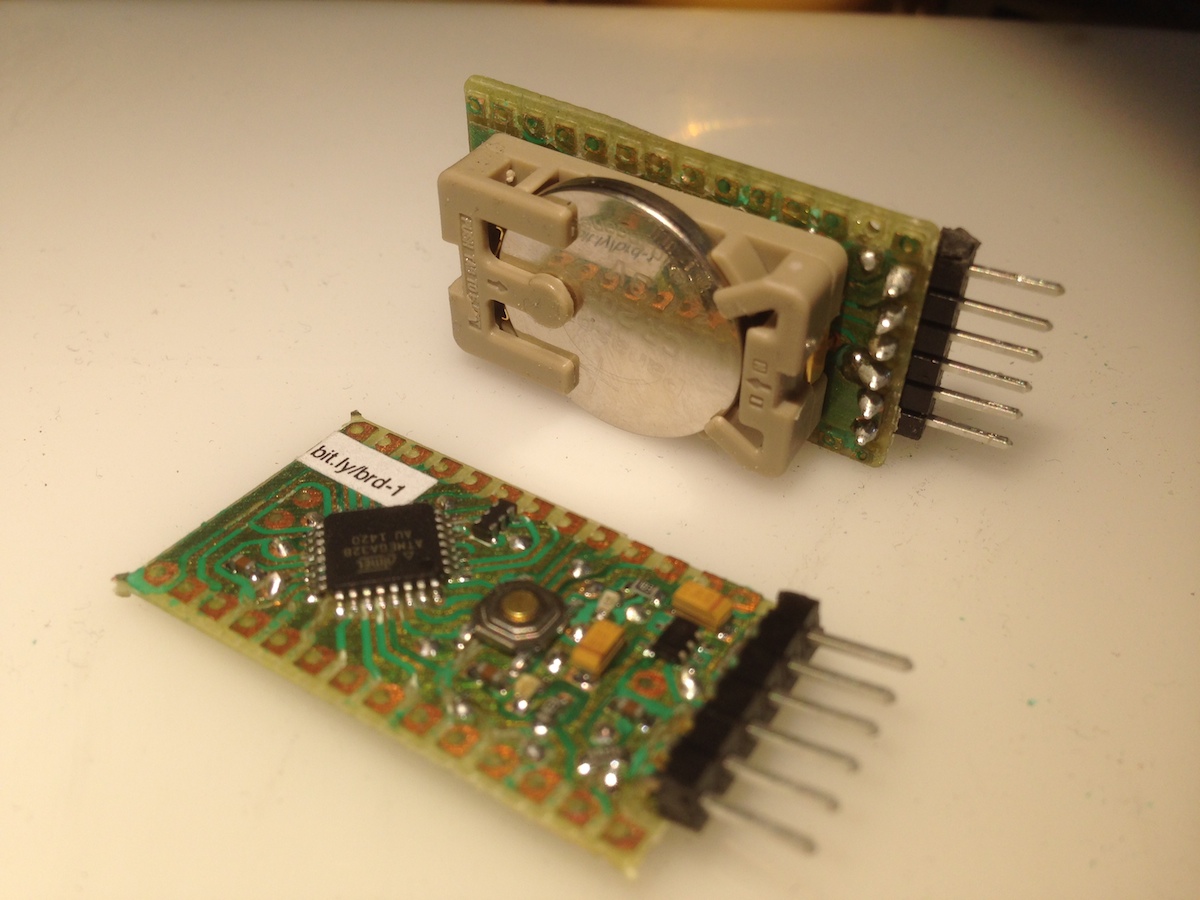
I decided to add the option of soldering a coin-cell battery holder onto the bottom. Here you can see one attached:
HARDWARE
arduino pcb diy